Saturday, July 19, 2014

Berry Kale Gummies

Last night I made a new flavor of gummies. I found a recipe here and used this brand of kombucha, bought on my field trip to Whole Foods Market last weekend. I altered it a bit to meet my sugar-free needs.
Ingredients
Instructions
  1. Note: It is important to have all ingredients ready before beginning as you'll need to work quickly once you start.
  2. Puree fruit to create a puree the consistency of applesauce or a little thinner. For me, defrosted frozen berries pureed in a blender or food processor work perfectly. Set aside one cup of pureed fruit.
  3. Set aside one cup of kombucha and/or fruit juice.(Here is how to make kombucha)
  4. Boil ½ cup water.
  5. Place ½ cup cool water in a medium sized bowl or quart size mason jar.
  6. Add ½ cup gelatin powder and stir quickly to create a paste.
  7. Quickly add the ½ cup boiling water and stir again briskly.
  8. This should form a thick but stirable liquid.
  9. Add the sweetener and stir.
  10. Add the kombucha/juice and pureed fruit and stir well. You can stir with a spoon or whisk, or use an immersion blender to make it really easy.
  11. Very quickly pour the mixture in to molds or a greased glass baking dish or other greased dish and allow to cool in fridge for 2-3 hours.
  12. Store in fridge in an airtight container for 1-2 weeks
I lined a brownie pan with clear wrap for a mold.
After the gummies set up I was able to pull them right out with the clear wrap.

Then I sliced them into tiny squares.

and sealed them in a quart sized, dated bag.


More Chia Pudding

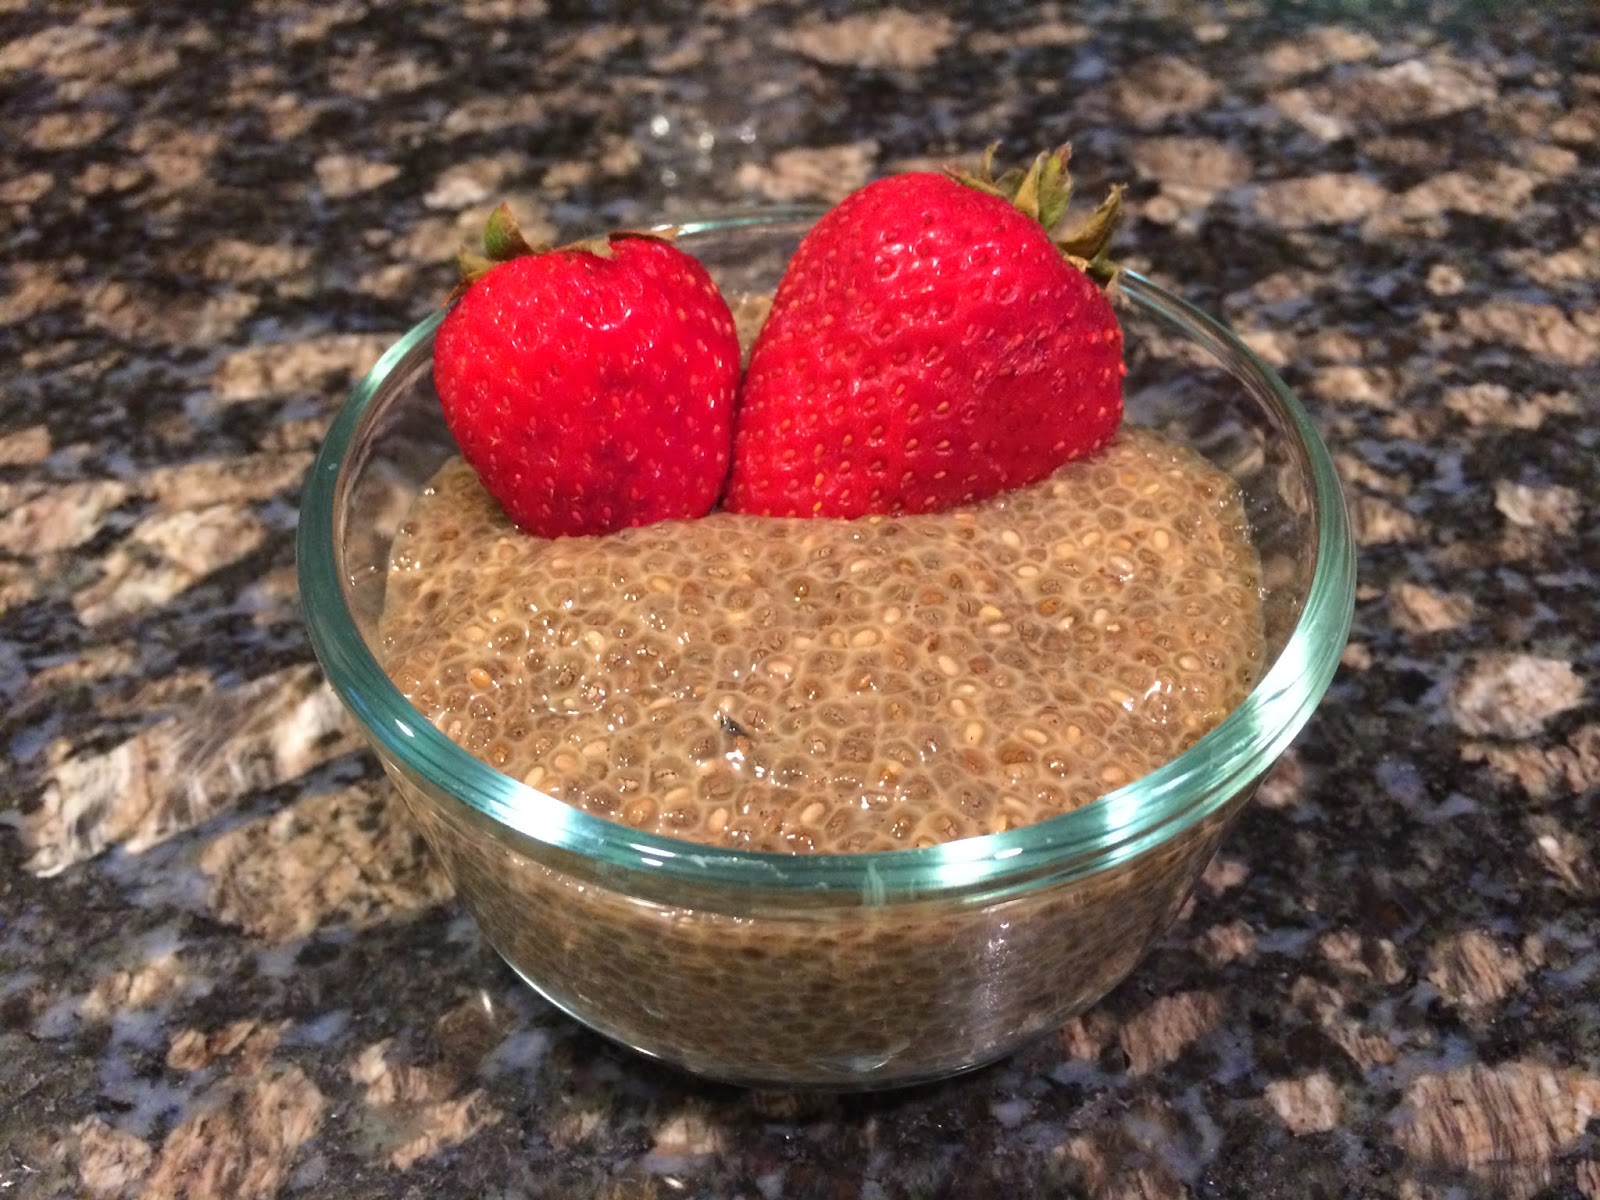
 I decided to make some more chia pudding for my upcoming road trip and store it in individual servings for my cooler. This is the recipe I started with, but I played around with some new flavor combinations and came up with these:


First Blend(in a mason jar):
1 cup Crio Bru brewed cocoa
2 T unsweetened cocoa powder
1 dropper full Chocolate Sweetleaf Stevia Sweetdrops
1/4 cup chia seeds
a splash of almond milk(add last, until the jar is nearly full)

Combine all ingredients. Put a lid on the jar and shake well, refrigerate. Come back in about a half hour and shake some more so the seeds don't all stick together. It will be ready to enjoy in 2-3 hours. Then I poured mine into little containers to have easy grab and go servings.
Second Blend:
1 cup Bengal Spice Herbal Blend Tea brewed
2 T unsweetened cocoa powder
1 dropper full Chocolate Sweetleaf Stevia Sweetdrops
1/4 cup chia seeds
a splash of almond milk(add last, until the jar is nearly full)

 Combine all ingredients. Put a lid on the jar and shake well, refrigerate. Come back in about a half hour and shake some more so the seeds don't all stick together. It will be ready to enjoy in 2-3 hours. Then I poured mine into little containers to have easy grab and go servings.


 Third Blend:
1 cup Crio Bru brewed cocoa
2 T unsweetened cocoa powder
2 t ground cinnamon
1 dropper full Chocolate Sweetleaf Stevia Sweetdrops
1/4 cup chia seeds
a splash of almond milk(add last, until the jar is nearly full)

Combine all ingredients. Put a lid on the jar and shake well, refrigerate. Come back in about a half hour and shake some more so the seeds don't all stick together. It will be ready to enjoy in 2-3 hours. Then I poured mine into little containers to have easy grab and go servings.

Thursday, July 17, 2014

Chai Chia Pudding


On the left is when I first placed it in the fridge, Right is after an hour or so.
The other day I went on a field trip to Whole Foods Market and found some chia pudding. Whole Foods Market is over an hour from my house and I have a ton of chia seeds on hand, so I decided to try and make some for myself. I found this awesome recipe. I left out the honey and used English Toffee Sweet Leaf Stevia Drops instead. I also used almond milk instead of coconut milk because I had just made some. It came out just as nice as the kind I bought from the store and it was unbelievably easy. I'm excited to play around with different flavor combinations.

Saturday, July 12, 2014

Paleo Chili

This chili has no beans and an interesting blend of spices. I found a chili recipe and altered it until it was my own. I like that it does not use any canned tomatoes, yet is incredibly easy to throw together and go on about your day.
Here is the recipe:
2 lbs ground beef 
olive oil 
3 whole tomatoes
half a white onion, chopped
1 bell pepper(any color), diced
3 garlic cloves, minced
pepper
sea salt
4 T chili powder
2 t garlic powder
2 t cayenne*
1 t oregano
1 t ground cumin
¾ t powdered mustard
½ t curry powder
3 stevia packets

Cook onions, peppers, and garlic in olive oil until translucent. Add beef and cook thoroughly. Add seasoning when meat is half cooked. Take 2 tomatoes and puree with stevia powder. Dice up 3rd tomato. When meat is done cooking add all tomatoes. Simmer on low-2 for several hours, stirring occasionally. 

*I like a good amount of spice, but this was a bit too much spice for my kids.  

<3 Baking Beauty 

Friday, July 11, 2014

Roasted Veggies and Mashed Cauliflower

Mashed Cauliflower

1 head of cauliflower 
2T minced garlic
1 t butter 
2 oz full fat cream cheese 
1/3 C full fat sharp cheddar, shredded at home 
Salt to taste
Freshly ground pepper to taste

Steam cauliflower until soft(about 8 minutes). Add all ingredients to the bowl of a food processor and process until smooth.
I add all of the extras to the blender before adding my steamed cauliflower.


Mashed cauliflower looks and tastes pretty similar to mashed potatoes.

 Roasted Brussels Sprouts(My Favorite!)

1 lb fresh Brussels sprouts
1-2 T olive oil
salt & pepper to taste
Place Brussels sprouts in a glass dish, drizzle with olive oil and toss until Brussels sprouts are thoroughly coasted. Add salt & pepper to taste. Roast in preheated oven at 400 for 35-40 minutes.

 Roasted Bell Pepper

2 sliced bell peppers(any color)
1 T olive oil
salt & pepper to taste
Place bell peppers in a glass dish, drizzle with olive oil and toss until thoroughly coasted. Add salt & pepper to taste. Roast in preheated oven at 400 for 35-40 minutes. Broil on high for 3 minutes. (They come out nice and sweet!)
My husband made steaks to accompany these sides. Delicious!


Thursday, July 10, 2014

Homemade Fruit Snacks


 Last night's little project was homemade gummies for my girls. My little one is 3 1/2 and has been asking for gummies, so I decided to give it a try. I already had some beef gelatin on hand from a previous project. I followed this recipe. I love how endless the possibilities are for flavors and to be quite honest, I think I was more excited about this one than my girls. I used pineapple juice(since we already had some on hand) and frozen strawberries(which we also already had, also). Instead of honey or maple syrup to sweeten I used a bit of my liquid vitamin and a squirt of Lemon Drop Sweet Leaf Stevia, since I am diabetic and try to avoid adding sugars to things. I was amazed at how quickly this recipe came together. I used a silicone mold I purchased from Amazon. I recommend placing your mold on something solid, like a cookie sheet, for transport. This was my first time using a silicone mold and I didn't think of that until the mold was full and I was barely able to move it without major spillage. I also ended up using a glass dish(greased with coconut oil) for a portion of the recipe, since my mold ran out of space. The recipes says wait 2-3 hours, but I'm pretty sure mine set up much quicker. Even without the mold, I was very happy with the results. I just cut the gummies in the dish into little squares and you can barely notice the different between them and the gummies from the mold. I can't wait to try another combination of flavors!


The white is the coconut oil that was used to grease the dish, it added a tropical flair to the finished product.


I sealed the gummies in a dated quart size bag and stuck them in the fridge.

Wednesday, July 9, 2014

Cheesy Chicken

Last night we had cheesy chicken and roasted eggplant, another meal that is easy to throw together. I placed the chicken on the broiler pan for baking so the excess liquid from my sauce could drain away. I sprinkled the chicken with Mrs. Dash Garlic and Herb, dolloped on some no sugar spaghetti sauce, and topped with hunks of mozzarella and a sprinkle of dried Italian herbs. Then I sliced my eggplant and sprayed the pan and the eggplant with some Olive oil from my misto and the remaining spaghetti sauce. I used the Mrs. Dash on this as well and added a sprinkle of Parmesan cheese. I baked both pans at 400 for 40 minutes. My kids love the chicken! <3 Baking Beauty

Tuesday, July 8, 2014

Easy Dinner

Last night's dinner was super easy and quite tasty. I love serving my family fish because it's so easy and quick(not to mention healthy and tasty). Last night we had cod. It goes from frozen to oven ready in a half hour or so(by placing the frozen fish in a bowl of water in the sink) then I bake it on a lined cookie sheet at 400 for 20 minutes. This time I added some green beans, bell peppers, and summer squash. I sprayed them all with Olive oil from my misto and seasoned them so my taste, I like a little Mrs. Dash and some heat from a sugarless Cajun blend. The fish and green beans were done after 20 minutes and then I broiled the other veggies on high for 5 minutes more. The peppers came out sweet like candy! Yum, perfect summer dinner.

Monday, July 7, 2014

Shenanigans in Savannah, GA

Today I had the pleasure of adventuring around historic Savannah, GA for the first time ever.  Just around the corner from the City Market I found two wonderful shoppes that are a must visit if you ever make it to this wonderful city.

The first must visit shoppe was the Savannah Bee Company where you can taste raw flavored honey, sample lovely honey mead, and play with their luxiorous body products.  The shoppe even has a coffe and tea bar. I could have spent hours exploring and sampling in the place! By the way, you can also order from them online and have their products shipped directly to your home.


He second must visit shoppe was The Salt Table. They offer many varieties of flavored Himalayan salt from sweet to savory. I especially enjoyed the maple flavored salt. Their selections aren't limited to just salt though. They also have pepper blends, flavored sugars and dipping herbs. I almost forgot the delicious tea blends and they too will ship directly to your home of you purchase from their web page.

Tuesday, July 1, 2014

Spaghetti Squash Casserole

From the Kitchen of The Veggie Vixen


Cooking tutorial on our YouTube Channel here.
Ingredients

1lb lean ground beef
3 lbs spaghetti squash
1 medium tomato, diced
1 medium onion, diced
1/2 bell pepper (yellow, red or green)
8oz baby portobello mushrooms, sliced
fresh minced garlic to taste (I use at least 6 cloves!)
1/2C fresh parsley, diced
1/4C fresh grated parmesan cheese
1/4-1/2C of your favorite fresh grated cheese (I use mozzarella, cheddar, or colby jack)
1-2T garlic powder
1-2T onion powder
extra virgin olive oil 
fresh ground pepper and Himalayan salt to taste


Directions

1. Begin by roasting spaghetti squash in a glass casserole dish with about 1 inch of water in the bottom at 350 degrees for 45 minutes, or until soft. (I usually do this a day or two ahead while I'm cooking something else in the oven. This saves me time on the day I make this casserole.) Cut squash in half and let cool on counter top until you are able to handle it without burning yourself. When cooled, use a fork and your hands to remove all seeds from the squash. After seeds are removed use your fork to separate the strands of squash, place them as the bottom layer of your casserole in a glass casserole dish.
 

2. While spaghetti squash is roasting dice all vegetable ingredients.
 

3. Brown ground beef in a non-stick skillet using extra virgin olive oil. Season your beef while cooking with about half of your onion and garlic powder. Use salt and pepper to taste. Add this mixture to your casserole dish in an even layer on top of the spaghetti squash.
 

4. Using the same non-stick skillet to sauté your veggies until they are tender. Use the remaining onion and garlic powder and some more salt and pepper to taste. Add this layer of veggies on top of your spaghetti squash and ground beef. Bake casserole in your oven at 350 degrees for 30 minutes.
 

5. Remove casserole from oven and top with parmesan cheese, parsley, and your favorite cheese. Bake for another 5-10 minutes or until nice and brown.


Cave Girls

Cave Girls
Veggie Vixen & Baking Beauty